The installation of porcelain tile is becoming an increasingly regular task for the modern day tiler. Customers desire the look of natural stone, but require the extra durability that porcelain tiles offer. With porcelain tiles being non-porous (impervious to water) and virtually maintenance free, they are the perfect solution for the progressively popular wet-room styled bathrooms.
With porcelain being one of the most popular choices of tile material available, and with the trend for porcelain tile set to continue, tilers have had to adapt their working methods and tools to be able to cater for the demands of their clients. Until recently, a large number of tile fixers have shied away from the installation and drilling of porcelain tiles due its perceived difficulty.
Dewalt 1 2 Drill
However, drilling holes in porcelain tile is not difficult! Using the correct methods and the best tools for the job, it is possible to achieve perfect cuts in a matter of seconds.
Recommended Equipment for Drilling Porcelain Tile
High quality diamond core drill bits
Carbide pilot drill bit - only required if you're drilling large diameter holes (13mm or larger) and don't have a suitable-sized (8mm) diamond drill bit
Masonry drill bits - included with quality tile drill bits
Water cooling equipment
Electric drill Clear safety glasses / goggles
RCD breaker
Identifying the Size of Hole to be Drilled
The first step is to correctly identify the size of hole to be drilled. This is very important, as the diameter of the hole to be cut dictates the method that you will use to drill into the tile.
The majority of holes that are 10mm and under in diameter will be drilled with the tile already fixed to the wall. Conversely, the majority of holes over 10mm in diameter will be drilled into the tile before the tile has been fixed.
When drilling holes that are 13mm or larger in diameter, make sure that the tile to be drilled is placed in a tray that will collect the waste water that is produced. Ensure that scrap tiles or another similar material is placed under the tile that is being drilled. This will help to halt the progress of the drill once it has finished drilling through the tile.
Before drilling tile, ensure that you are wearing the correct safety equipment, including safety glasses or goggles. Ensure that you are using a residual current device (RCD) to help prevent electric shock.
Drilling Small Diameter Holes (10mm or Smaller) with Diamond Cores
1. Mark the center of the hole to be drilled into the tile by using a marker or a sticky drive pad.
2. Attach the appropriate diamond core bit to the electric drill and ensure that there is a constant supply of cold water that is being directly aimed at the diamond core i.e. by using water cooling equipment.
Note regarding water cooling... It is important to ensure that there is a constant supply of cold water directed at the drill bit in order to keep the diamond core cool and to help remove any debris that may have built up whilst drilling the tile. It is not advisable to try and cool the diamond drill bit by using a hand held aspirator or drilling through a wet sponge. These methods will not keep the drill bits cool enough, and will drastically shorten the life of the drill bit.
3. Ensure that the drill is in "normal" mode and set the drill to between 1000 and 1500 rpm. If you have marked the tile with a marker it is best to drill into the tile using a method called "leaning in". "Leaning in" ensures that the drill will not slip and wander off center as you begin to drill into the tile.
How to "lean in"... To "lean in", simply start the drill at an angle, as soon as the drill bit has started to cut the tile, slowly bring the drill into a vertical position. Ensure that sufficient pressure is being applied (tile dust should be evident in cooling water) and rotate slowly until you have cut the perfect hole. As you finish the hole, you will notice that the tone of the drill will change.
Using sticky drive pads... If you use a sticky drive pad, it is unnecessary to use the "leaning in" method. Simply start the drill in a vertical position and the sticky pad will ensure that the drill does not slip. Once you have finished drilling the tile, simply peel off the sticky drive pad.
4. Because the majority of small diameter holes will be cut into tiles already fixed to the wall, it will be necessary to drill a fixing hole behind the tile. Replace the diamond core with the appropriately sized masonry drill bit and set the drill to "hammer" mode. Use a slow speed for drilling into hard materials to ensure that the tip doesn't overheat. Ensure that the drill bit is frequently withdrawn in order to stop a build up of dust.
Drilling Small Diameter Holes (10mm or Smaller) with Carbide Bits
1. Firstly, mark where the hole will be drilled, on the tile, using a marker.
2. Attach a carbide drill bit to your drill. Ensure that there is a constant supply of cold water that is being directly aimed at the selected drill bit i.e. by using water cooling equipment.
Note regarding water cooling... It is important to ensure that there is a constant supply of cold water, in order to keep the drill bit cool and to help remove any debris that may have built up whilst drilling the tile. It is not advisable to try and cool the drill bit by using an aspirator or drilling through a wet sponge, these methods will not keep the drill bit cool enough, and the drill bit will burn out.
3. Set the electric drill to between 700 and 900 rpm. Make sure that the drill is in "normal" mode.
4.Push the carbide drill bit gently into where you have marked the tile until you hear a cracking sound. Start drilling from a vertical position with sufficient pressure and don't stop until you hear a change in the tone of the drill. As soon as you hear the change in the tone, begin to ease off.
5. Because the majority of small diameter holes will be cut into tiles already fixed to the wall, it will be necessary to drill a fixing hole behind the tile. Replace the carbide drill bit with the appropriately sized masonry drill bit and set the drill to "hammer" mode. Use a slow speed for drilling into hard materials to ensure that the tip doesn't overheat. Ensure that the drill bit is frequently withdrawn in order to stop a build up of dust.
Drilling Large Diameter Holes (13mm or Larger)
1. In order to cut holes that are 13mm or larger in diameter, it is necessary to first drill a pilot hole. The pilot hole will act as a locater for a large diamond core and will help you to drill a perfect hole in porcelain tile.
2. Attach an 8mm carbide drill bit or 8mm diamond bit to your drill. Follow the instructions given above for either "Drilling Small Diameter Holes (10mm or Smaller) with Diamond Cores" or "Drilling Small Diameter Holes (10mm or Smaller) with Carbide Bits", depending on whether you are using diamond cores or carbide drill bits. Leave out the final step in either case as you won't be drilling a fixing hole behind the tile.
3. Now that the pilot hole has been cut, it is possible to drill the main (large) hole. Attach the appropriate diamond core and ensure that there is a constant supply of cold water (see water cooling information in the previous sections of this article).
4. Diamond cores that are larger than 13mm will require an adapter with pilot pin that locates into the pilot hole that has been cut previously, to ensure the perfect hole will be made.
5. Starting the drill vertically, begin to drill in a circular motion with sufficient pressure until the tone of the drill changes. Drilling holes into porcelain tile should take seconds not minutes. If it is taking you minutes, it is likely that you are not applying enough pressure or that you are using an incorrect setting on the power tool. See video below.
Best Tools for the Job
In order to drill perfect holes in porcelain tile, it is extremely important to use premium quality drill bits.
Armeg have been producing innovative, high quality drilling solutions for over 30 years and Armeg's PTC (Porcelain Tile Cutter) range is at the forefront of tile drilling technology.
The Armeg PTC Diamond drill bit range boasts diamond core drill bits that are capable of cutting hundreds of holes in all grades of porcelain. They feature thin wall, continuous diamond crowns for and fast and efficient cutting and an extended life. These diamond cores are not to be confused with short-life diamond grit alternatives. Not only do these diamond drill bits cut porcelain, they also cut materials such as marble, granite, travertine, slate, quarry tiles, ceramic tiles, natural stone and limestone.
The Armeg PTC Carbide drill bit range comprises of excellent porcelain tile drill bits that are capable of cutting 15-25 holes in grade 5 porcelain, or 50+ in lesser grades of porcelain. These carbide drill bits boast non-slip start-up thanks to diamond-ground tip geometry.
The Armeg PTC Soft Tile drill bit range is ideal for drilling softer tiles such as ceramics and travertine. They feature point-ground tips to help reduce slippage and wander.
Armeg Tile Drilling Accessories for use with Armeg PTC drill bits include: water feed pump kit, water feed adapters, water feed clamp & drive/piloting guides to ensure non-slip start-up with small diameter diamond cores. Armeg SDS Plus tile removing chisel also available in this range.
Black Friday DEWALT DC725KA 18-Volt Cordless Compact Hammer Drill/Driver 2011 Deals
Nov 17, 2011 00:36:28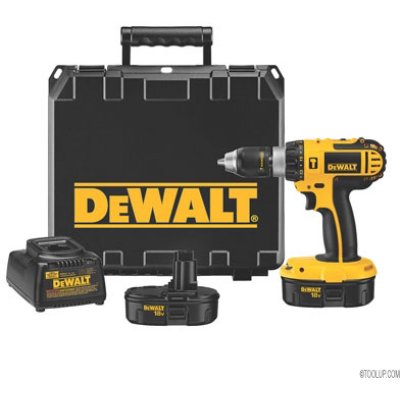
Click for larger image and other views

Black Friday DEWALT DC725KA 18-Volt Cordless Compact Hammer Drill/Driver Feature
- Compact size allows users to fit into tight spaces; lightweight design (4.9 lbs.) minimizes user fatigue
- 1/2-inch single-sleeve ratcheting chuck reduces bit slippage
- Dual-speed range of 0-500/0-1,700 rpm 0-8,500/0-29,000 bpm delivers optimal performance
- High-performance frameless motor delivers maximum power of 410 unit watts out
- LED worklight provides increased visibility in confined spaces
Black Friday DEWALT DC725KA 18-Volt Cordless Compact Hammer Drill/Driver Overview
Handle everything from wood and steel to masonry and concrete with the DEWALT DC725KA 18-Volt Compact Cordless Hammer Drill Kit. With its high-performance frameless motor, this DEWALT drill makes quick work of drilling and fastening tasks. Enjoy dual-range, variable-speed control and a comfortable grip for job-specific performance and minimal fatigue. In addition to the hammer drill, this kit includes a convenient one-hour NiCad charger, two 18-volt NiCad batteries, a screwdriver bit, and a sturdy kit box.
|


 |
 |
Featuring a high-performance, frameless motor capable of delivering a maximum of 410 unit watts, the DEWALT 18-Volt Compact Cordless Hammerdrill handles a broad range of applications. It also features dual-range, variable-speed control--from 0 to 500/0 to 1,700 rpm and from 0 to 8,500/0 to 29,000 bpm--for precise hole placement and material-specific performance.
 LED illuminates work area |
The DC725KA is built with an ergonomic grip for comfortable handling that assists in ensuring accurate results. Its balanced mid-handle grip makes control easy, while a 360-degree side handle offers hand-position options for comfort and reduced fatigue when tackling extended applications.
This hammer drill weighs an easy-to-manage 4.9 pounds and features a convenient LED for visibility.
Cordless Design and Ratcheting Chuck
The DC725KA's cordless design allows you to move quickly between projects without the hassle of a cord or outlet. With the one-hour charger, you can reduce downtime and quickly recharge the long-life 18-volt NiCad batteries.
 All-metal 1/2-inch chuck |
The DC725KA 18-Volt Compact Cordless Hammer Drill Kit comes with a DEWALT warranty package that includes a three-year limited warranty, a one-year free service contract, and a 90-day money-back guarantee.
What's in the Box
DC725KA 18-Volt Compact Cordless Hammer Drill Kit, two 18-volt NiCad batteries, one-hour NiCad charger, and kit box.
 |
SAVE NOW on Black Friday offers below!
Available In Stock. |
| This Black Friday DEWALT DC725KA 18-Volt Cordless Compact Hammer Drill/Driver ships for FREE with Super Saver Shipping. |
Price : Click to Check Update Prices Please. |
